-Download Samsung Smart Switch (opens in new window) for your PC
-install the package
-run Smart Switch and follow instructions.
- + See this full tutorial
• Enabling USB Debugging •
-Go to your settings
-Go to "about phone"
-Tap "build number" multiple times until it says "you are now a developper!"
-Go into Developper Options
-Turn on USB Debugging
• Running Easy Restore •
-download my copy of platform-tools (Easy Restore) onto your PC
(This is the standard ADB download with my added batch files)
-extract the files (preferably to your desktop)
-install the USB drivers (included if needed)
-ensure USB Debugging is enabled
-plug your phone into your computer
-once you hear the device connected sound in windows, run (double-click) "RUNME.bat"
Full Tutorial - Running Easy Restore |
|
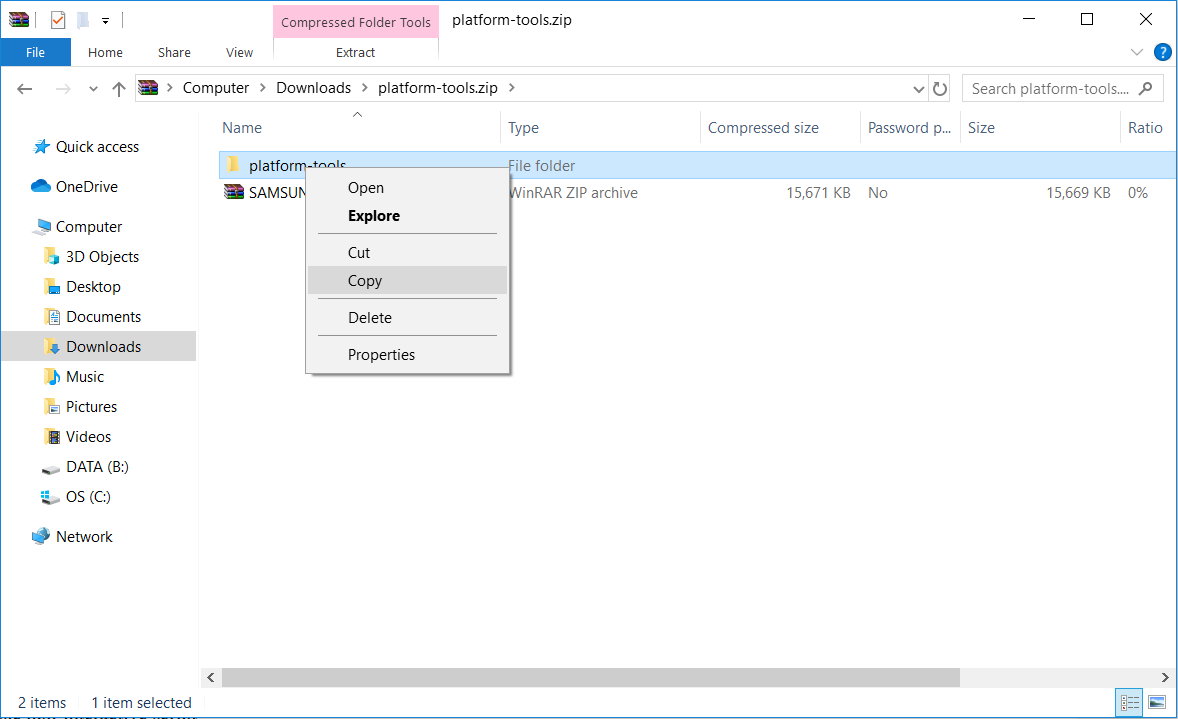
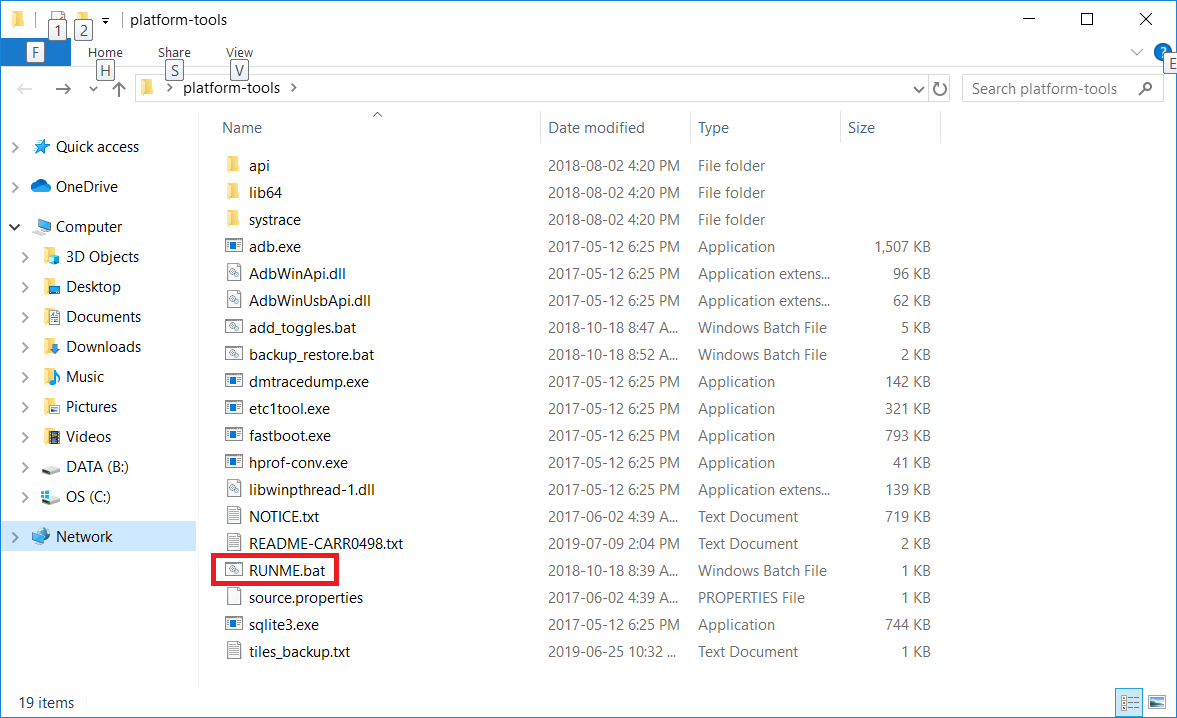
| Step 1: extract the platform-tools.zip files onto your desktop. You can use either Windows' built-in zip archive manager (File Explorer), or WinRAR. In this example, we're using File Explorer. Right click on the "platform-tools" folder, select "copy", minimize all windows, and then right click on your desktop and select "paste". | Step 2: Run (double click) the RUNME.bat file contained in the platform-tools folder you just created on your desktop. |
 (click to enlarge) |
 (click to enlarge) |
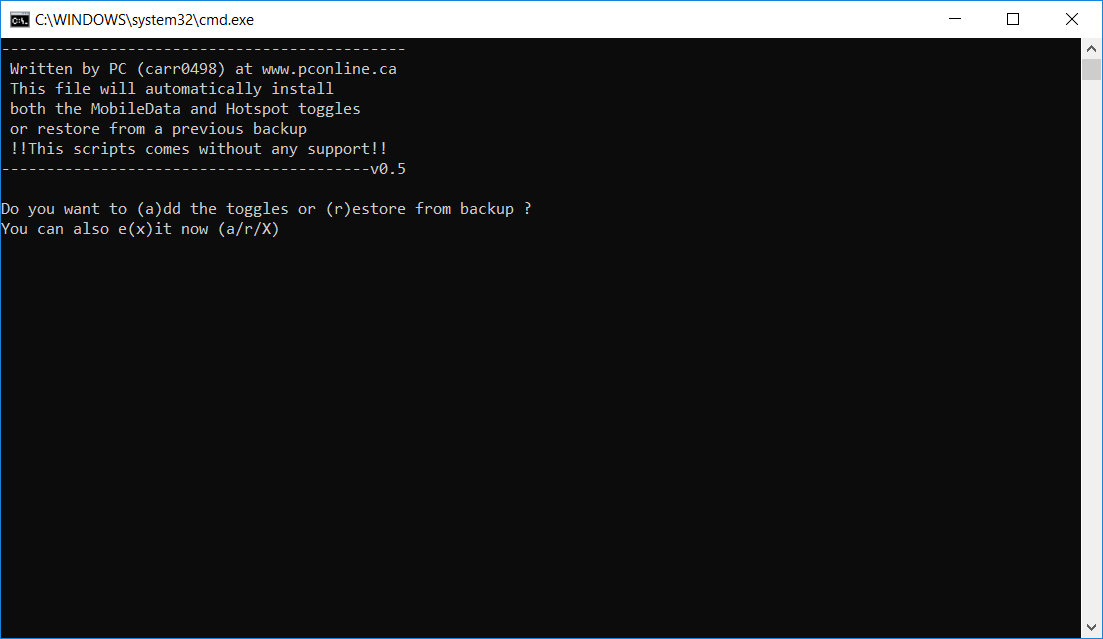
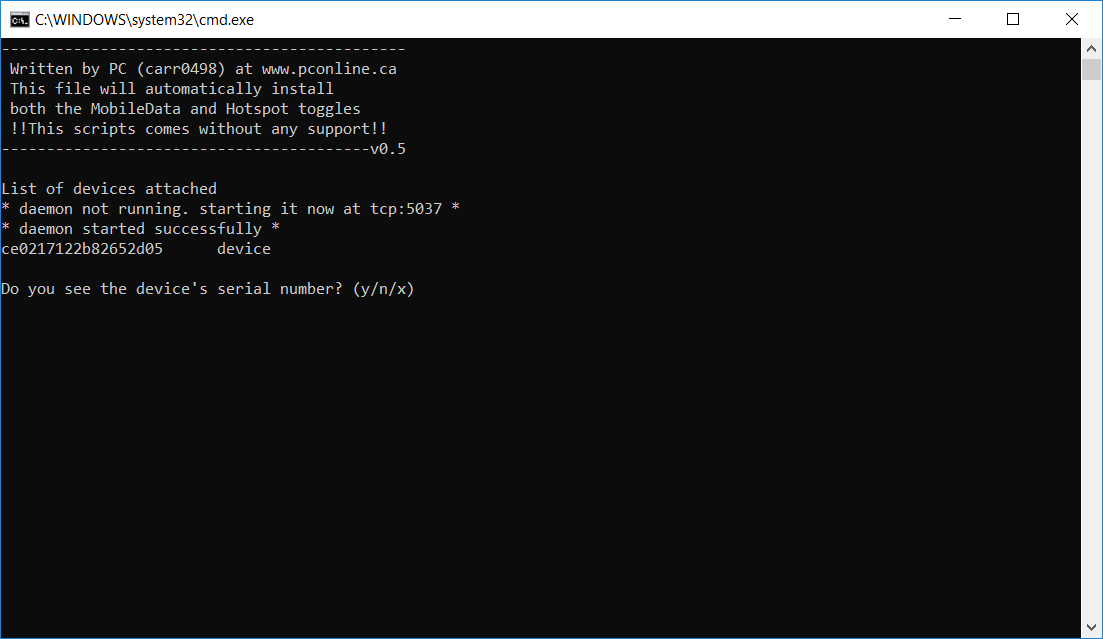
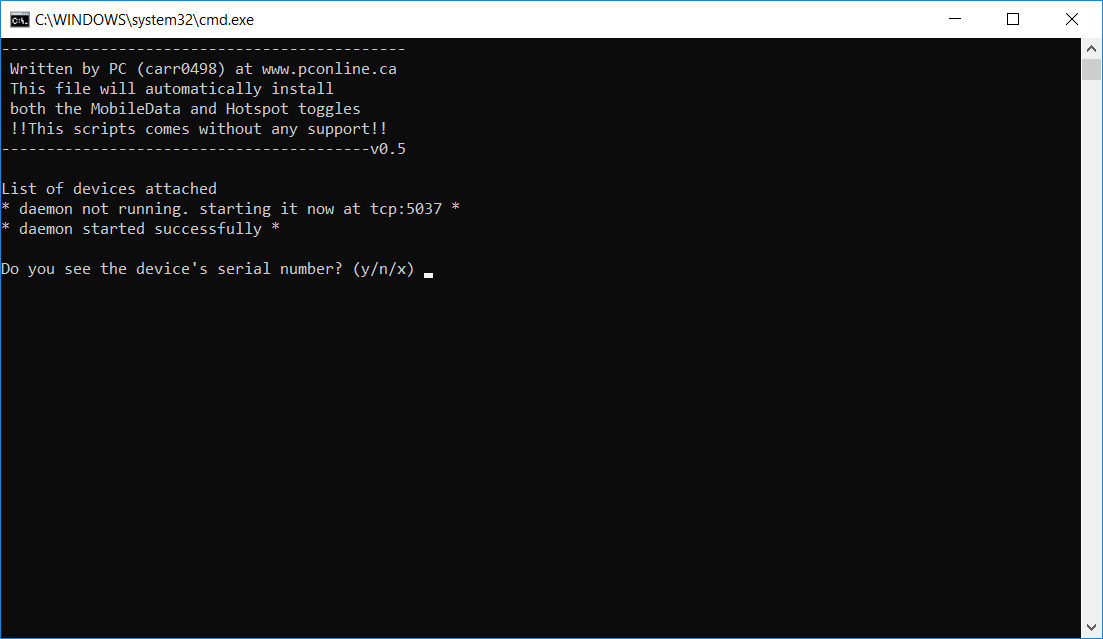
| Step 3: ensure USB debugging is turned on that your device is plugged in to your PC. Now you will choose to add the Toggles | Step 4: You will be asked if you see your device. If you do not see your device, ensure USB debugging is on. |
 (click to enlarge) |
 (click to enlarge) |
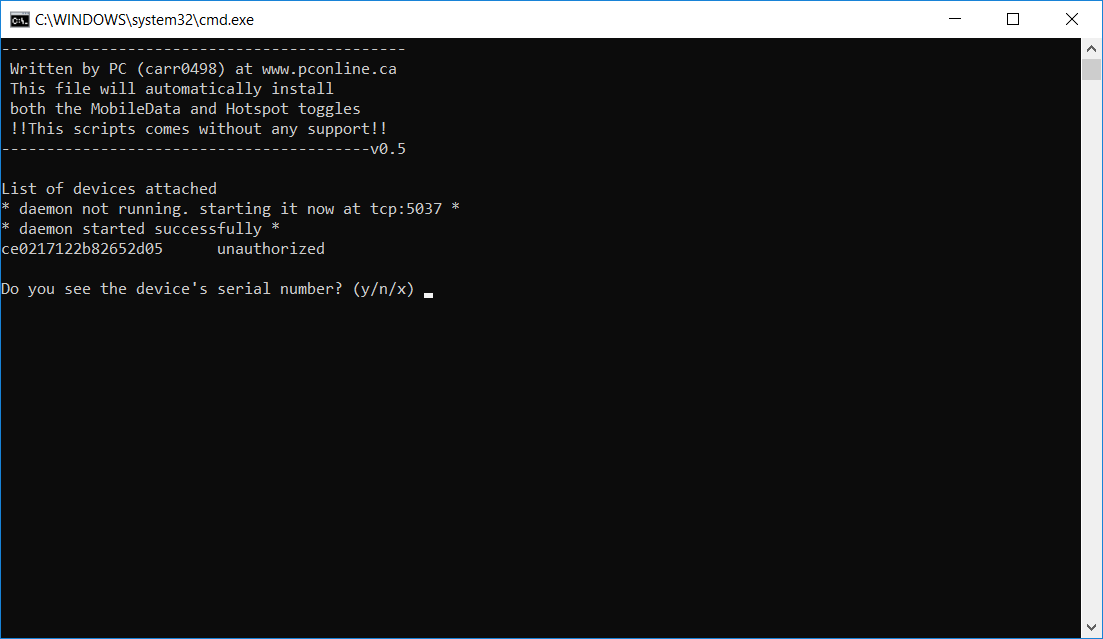
| Step 4.1 (troubleshooting): If you see this screen, that means your phone is not recognized by the PC. Verify that you have the USB drivers installed (part of package), that your device is connected to the PC via a functional data cable, and that USB debugging is turned on. | Step 4.2 (troubleshooting): If you see this screen, your device is recognized, but not yet authorized. Unplug your phone, and plug it back in, you will need to allow access to your phone data, and allow the RSA key fingerprint (steps 4.3 and 4.4) |
 (click to enlarge) |
 (click to enlarge) |
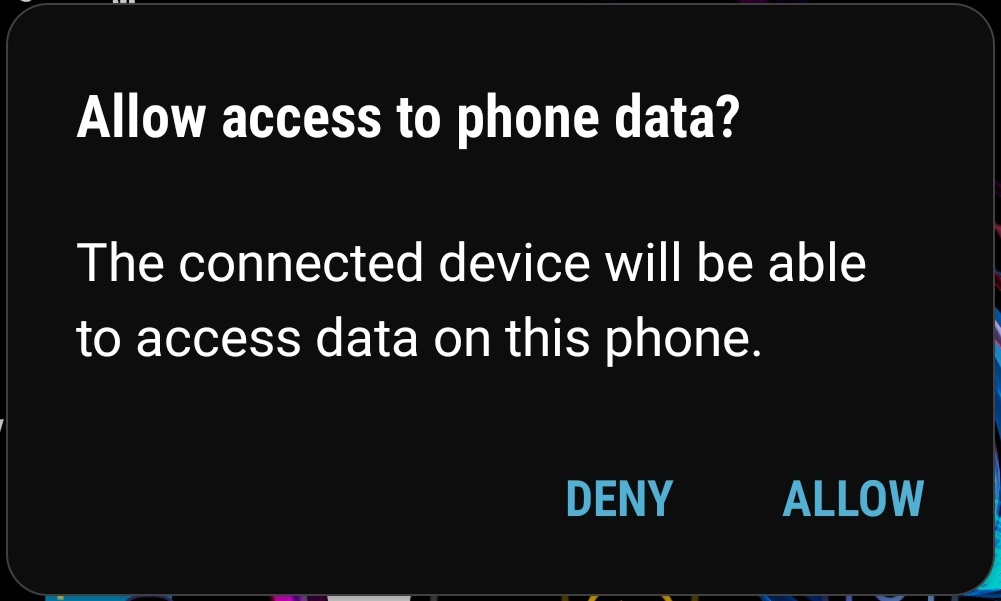
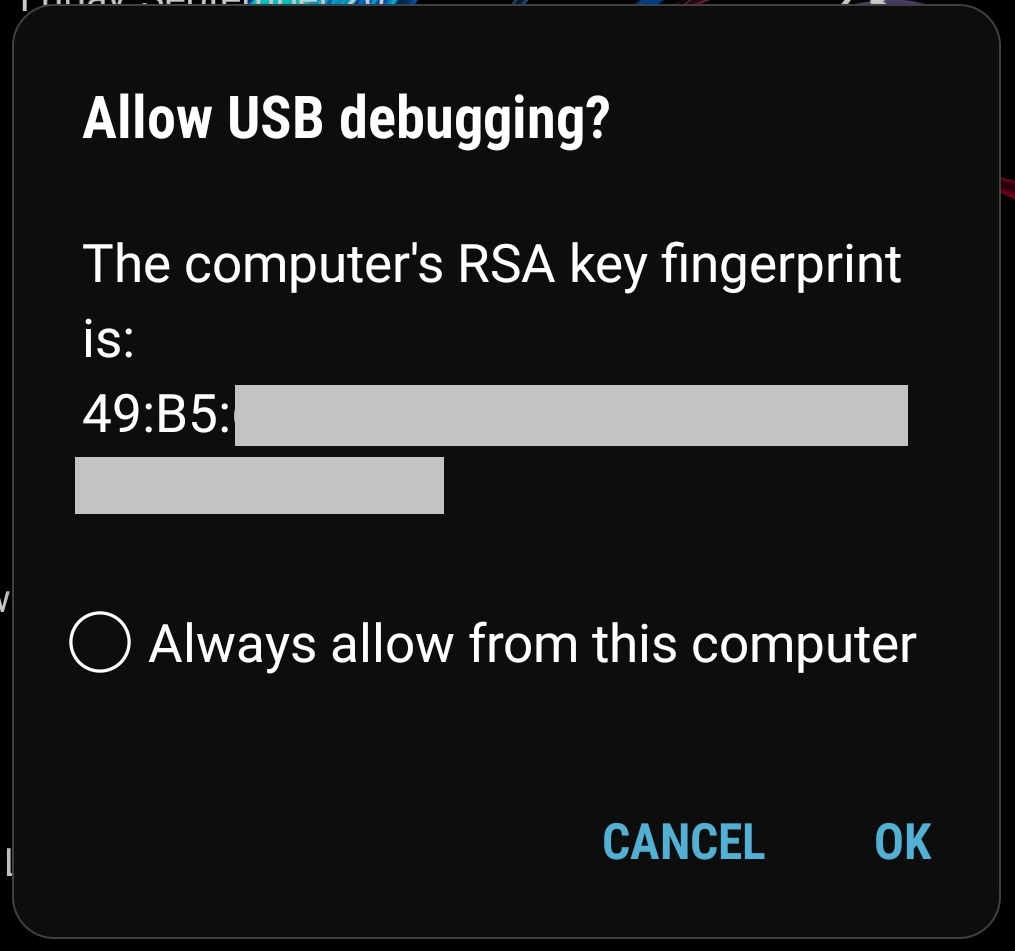
| Step 4.3 (troubleshooting): If you see this screen, always click "Allow" | Step 4.4 (troubleshooting): If you see this screen, enable "Always allow from this computer" and click "Allow" |
 (click to enlarge) |
 (click to enlarge) |
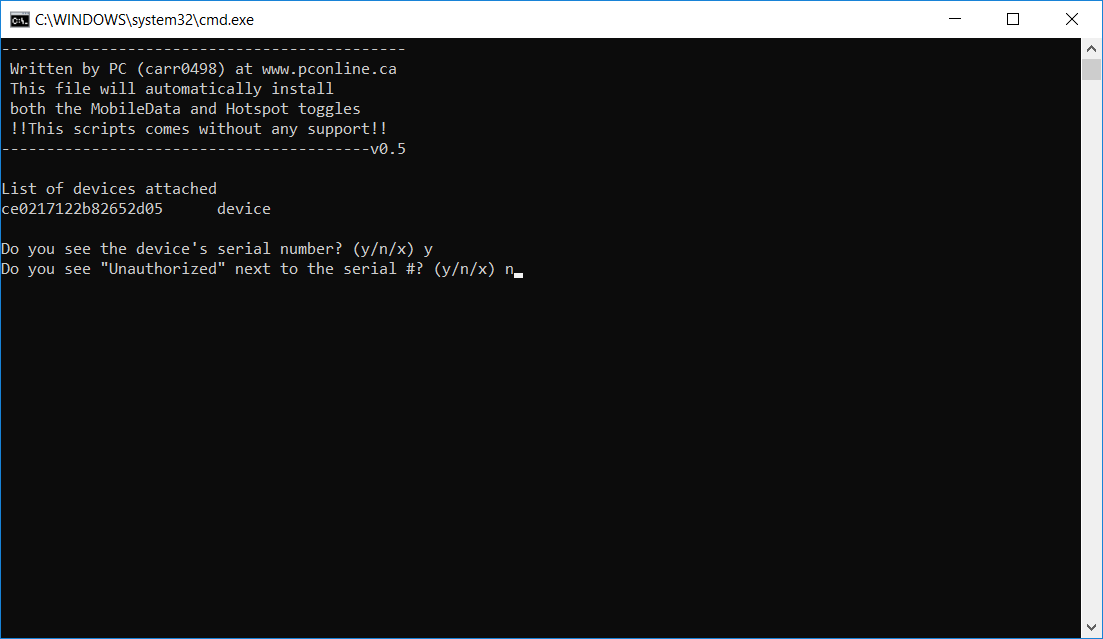
| Step 5: Now that you see your device's serial number, and do not see the word "Unauthorized", you can answer "n" to the next question, this will begin the process of verification. | Step 6: The verifiation process allows you to confirm if the script has properly extracted the information from the device. If you do not see a big chunk of words like shown below, it didn't get it properly. Answer the question with "y" or "n" depending on the results. |
 (click to enlarge) |
 (click to enlarge) |
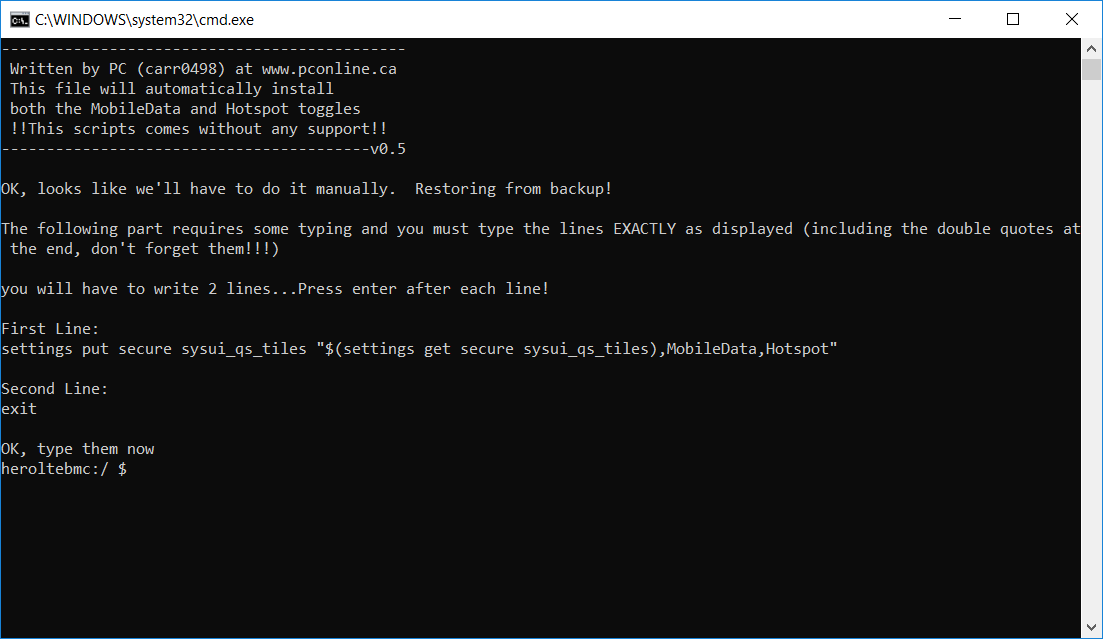
| Step 7: The script will attempt to push the tiles to your device. You should be able to pull down your menu now, and verify if your phone now has the tiles added. If you have more tiles than can fit on the screen, you may need to scroll to the right in order to see them. If they appear, answer "y" and the script will exit. If they don't appear, answer "n" to this question. | Step 7.1 (Manual Mode): If the tiles didn't appear, and you answer "n" to the previous question, the script will undo what it tried to do, jump into Manual Mode, and tell you the commands to enter. Pay close attention to the instructions and the commands the scripts tell you to enter. It is important that you not make a mistake. If you do, you can answer "n" when you exit, and then press "x" to quit the script with your previous tiles. |
 (click to enlarge)
|
 (click to enlarge)
|